Our friend Tim's expertise and assistance has been integral to our quick progress in this last week. Tim was the perfect person to help us on this project, having built his own custom caravan. In fact, the designs for our caravans are quite similar, the main difference being that he used curved logs for his roof supports.
Once we had our floor platform completed, the next step was to begin framing up the sections of our walls. We did our long walls in three separate sections, in order to accommodate the wheel wells, and to avoid having to lift long heavy sections. We had decided on the placement and height of our windows while determining our floor plan. Lots of measuring and cutting ensued. Luckily, Tim is old hat at that game, and we did about half of the framing in one day. Another short day of work saw us complete a good deal more framing, and having most of the cuts prepared for the next day's work.
 |
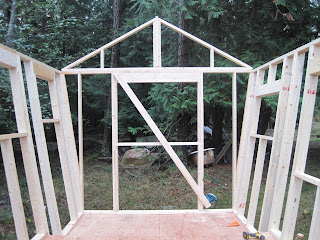
| Framing for kitchen end-wall. The diagonal brace held it solid and square until put in place. |
 |
| Installing wall above wheel well. |
 |
| Coming together. |
 |
Our Hero: Tim installs the double plate.
|
Tip of the Week: One of your most important resources is your tool belt. Get in the habit of wearing it, and training yourself to return your tools (pencil, tape measure, speed square, hammer....) to your belt immediately so that you don't walk away to another area of your worksite only to realize you left your tape measure at your chop saw. I have wasted countless minutes walking back and forth, looking around for my pencil.
Thanks to all the people who have taken the time to read our blog and share it with others who might find it interesting or inspiring. We have been inspired by our friends, who have shown us it's possible to build yourself a modest home at a reasonable price.
Hurray for life without a mortgage!
With love,
Bailey and Scott.

This comment has been removed by the author.
ReplyDeleteThank You Scott and bailey for inspiring me to start a blog about my adventures off the grid and floating on the cheap .
ReplyDeleteYour home is totally radical and i cant wait to come check it out and celebrate life without a mortgage on land !